Ultraviolet Sterilizer Review: Is UV Right for You?

A private well can look clear, smell normal, and still contain microorganisms that should not be in your drinking water. That is why an ultraviolet sterilizer review should begin with the real question: is UV the right safeguard for your water source and your household or facility?

Ultraviolet, or UV, water treatment is a highly effective disinfection method when it is correctly sized, installed, and maintained. It does not change the taste of water, add chemicals, or remove minerals. Its role is specific: to inactivate bacteria, viruses, and other microorganisms as water passes through the system.

What an ultraviolet sterilizer actually does

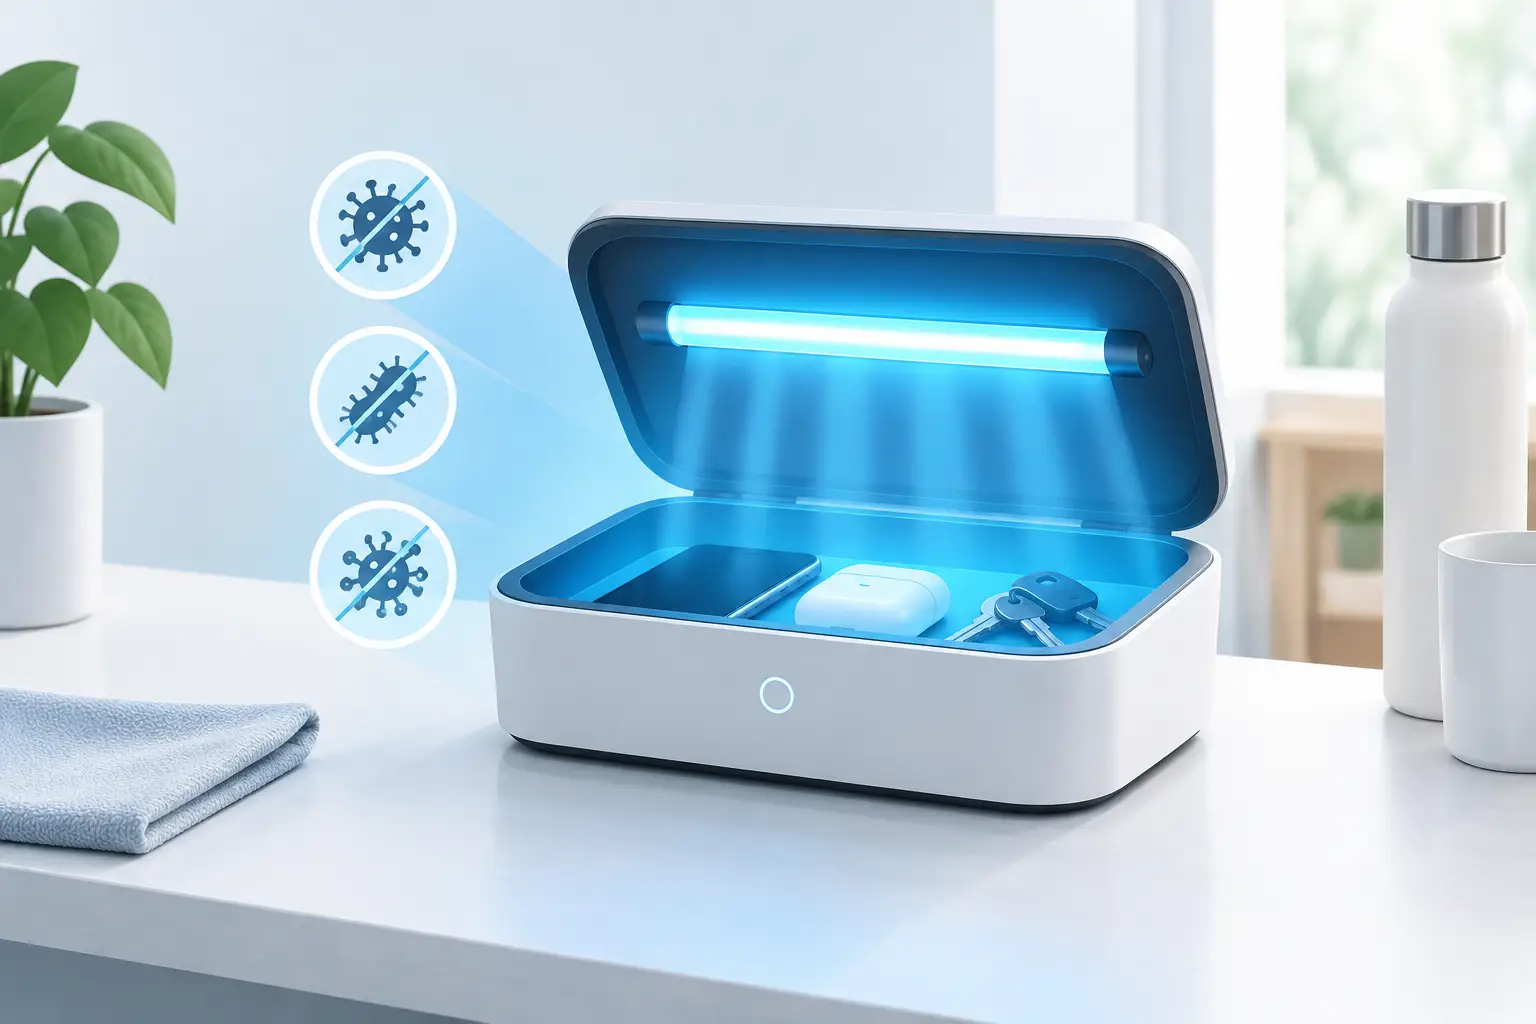
A UV sterilizer directs water through a chamber containing a specialized UV lamp. The light disrupts the genetic material of microorganisms, preventing them from reproducing. The organisms are not filtered out of the water, but they are rendered unable to cause infection.

For Ontario homeowners using well water, this can provide valuable protection against microbiological contamination from surface runoff, flooding, changing groundwater conditions, or issues within a well system. For cottages, lake-water applications, rental properties, schools, and other high-use buildings, UV disinfection can also be an essential final treatment barrier.

The key word is final. A UV system performs best after water has been properly prepared. Sediment, iron, hardness, and cloudy water can block or scatter UV light, allowing microorganisms to pass through without receiving the required dose.

Ultraviolet sterilizer review: the benefits that matter

The strongest reason to choose UV is dependable disinfection without chemical handling. There is no chlorine taste, no chemical storage, and no contact tank required for a typical residential installation. Water is treated as it flows through the chamber, so there is no waiting period after the system is operating properly.

UV systems are also practical for whole-home use. When sized for the actual flow rate of the home, they can protect water used for drinking, cooking, showers, laundry, and brushing teeth. This is especially meaningful for families with young children, older adults, or anyone who wants added confidence in a private water supply.

For commercial and institutional properties, the same principle applies at a larger scale. Hotels, clinics, schools, care facilities, and food-service operations may require high-flow UV equipment engineered around demand, plumbing layout, and treatment objectives. A properly designed system protects the water supply without disrupting routine operations.

UV has another advantage: it works without changing beneficial mineral content. If your water is otherwise good but requires disinfection, a UV unit may be a focused solution rather than an unnecessary overhaul of the entire water chemistry.

Where UV systems have limits

An honest review must address what ultraviolet treatment cannot do. UV does not remove lead, dissolved iron, manganese, sulphur odour, hardness, salt, pesticides, chemicals, or sediment. It is not a replacement for a water softener, carbon filter, reverse osmosis system, or iron-removal system when those treatments are needed.

It also does not provide residual protection after the water leaves the UV chamber. Chlorination can leave a disinfectant residual in plumbing, while UV treats water at the point where it passes through the unit. For most properly maintained residential systems, that is appropriate. However, water with bacterial regrowth concerns, complex storage tanks, or long plumbing runs may need a broader treatment plan.

Water clarity is the deciding factor in many installations. If the water contains visible particles or has elevated turbidity, those particles can shield microorganisms from the ultraviolet light. Hard water and iron can also build up on the quartz sleeve surrounding the lamp, reducing performance over time.

That does not make UV a poor choice. It means pretreatment matters. A sediment filter may be enough in one home, while another may require iron removal, water softening, or both before the UV unit. Water testing identifies the correct sequence.

What to look for before choosing a UV sterilizer

The most important specification is not the lamp’s advertised wattage. It is the validated UV dose at your required flow rate. A unit must have enough capacity to treat the maximum flow your household or building can demand, not simply the average amount of water used in a day.

A small home with one bathroom has different needs than a home with several bathrooms, a large soaker tub, and multiple appliances running at once. Similarly, a commercial property must account for peak demand, not just occupancy. Undersizing a UV system can create a false sense of security when water flow exceeds its effective treatment capacity.

Look for a system with a clear service design. The lamp should be accessible for annual replacement, and the quartz sleeve should be removable for inspection and cleaning. A controller with an audible or visual lamp-life alarm is also valuable, since a UV lamp may continue to glow after its effective germicidal output has declined.

For critical applications, UV intensity monitoring provides another layer of assurance. Unlike a basic countdown timer, a sensor monitors the amount of UV light reaching the water. This is particularly helpful where water quality can change or where treatment documentation is important.

Installation is part of performance

A quality UV unit can underperform if it is installed in the wrong location. In most whole-home systems, UV is placed after sediment filtration and any equipment used for softening, iron removal, or carbon filtration. This arrangement gives the UV chamber the clearest possible water to treat.

Professional installation also addresses shut-off valves, bypass arrangements, electrical supply, drain requirements, pressure considerations, and local plumbing practices. The system should be mounted where annual maintenance can be completed without cutting pipes or dismantling other equipment.

For well water, a water test should be completed before selecting equipment and repeated when conditions change. Heavy rain, spring thaw, construction near the well, or a change in taste, colour, or odour can all justify retesting. A UV system is highly effective against microorganisms, but it should be selected as part of a plan based on the actual water quality.

Ongoing maintenance is simple but non-negotiable

UV maintenance is predictable. Most systems need a lamp replacement every 12 months, even if the lamp still appears to be working. The quartz sleeve should be inspected and cleaned or replaced as needed, especially in areas with hard water or iron.

Pre-filters need regular service as well. A plugged sediment cartridge can restrict water flow, while a neglected filter may allow poor-quality water to reach the UV chamber. Keeping a simple annual service schedule is the best way to protect both performance and water pressure.

If the system has been shut down for an extended period, serviced, or exposed to questionable water conditions, follow the manufacturer’s restart and disinfection procedures. In some situations, the plumbing may need to be disinfected to address contamination beyond the UV chamber itself.

Is an ultraviolet sterilizer worth it?

For a municipal-water home with no microbiological concern, UV may be optional. For a private well, cottage, lake-water source, or property where bacterial safety is a concern, it is often one of the most practical investments available. The value comes from pairing the system with the correct pretreatment and installing it for the flow rate the property truly requires.

Canadian Smart Home Solutions approaches UV as part of a complete water-treatment solution, not a one-size-fits-all add-on. The right system should address the risks in your water while protecting your plumbing, appliances, and daily confidence in every tap.

If you are considering UV disinfection, start with a current water analysis and an honest assessment of your property’s demand. A properly selected ultraviolet sterilizer is quiet, chemical-free, and easy to live with – but its real strength is the protection it provides when the rest of the treatment system is designed to support it.

Water Filter Reviews: What Ontario Homes Need

A filter that makes water taste better is not automatically the right system for a home with hard water, lead concerns, sulphur odours, or a private well. That is why water filter reviews can be useful, but only when you know what the reviewer’s water problem was in the first place. A five-star countertop filter review may tell you very little about whether it can protect plumbing, appliances, or a family’s drinking water supply.

For Ontario homeowners, the best choice starts with the condition of the water entering the home. Municipal water, well water, lake water, and water from older plumbing can each require a different treatment approach. The right review helps confirm how a system performs. It should not replace water testing, a proper assessment, or professional installation when the issue affects the whole property.

How to Read Water Filter Reviews Properly

Start by looking beyond the overall star rating. Reviews are most valuable when they explain the original concern, the system installed, and the result after several weeks or months of use. Comments such as “the water tastes cleaner” are encouraging, but they are incomplete if your main concern is iron staining, limescale, bacteria, lead, or cloudy well water.

Look for details that match your situation. A homeowner on municipal water may be reviewing a reverse osmosis drinking water system for chlorine taste and confidence at the kitchen tap. A rural homeowner may be reviewing an iron and sulphur removal system, ultraviolet sterilizer, sediment filter, and water softener working together. Both may be happy with their results, but the equipment is solving entirely different problems.

Pay close attention to reviews that mention installation quality and follow-up service. Water treatment equipment must be correctly sized for household demand, plumbing configuration, water pressure, and the contaminants present. An undersized system can reduce flow. A system selected without a water analysis may leave the root cause untreated. Long-term satisfaction often comes down to the quality of the assessment and installation, not just the equipment itself.

What Good Reviews Should Tell You

The most helpful water filter reviews usually answer practical questions. Did the system improve taste or odour? Did it stop orange staining in sinks and toilets? Has scale buildup on faucets, shower glass, and appliances been reduced? Is maintenance straightforward? Did the installer explain filter changes, salt requirements, service intervals, and warranty coverage?

For a drinking water filter, reviewers should identify what the unit is intended to reduce. Carbon filtration is often chosen to improve taste and reduce chlorine-related odours. Reverse osmosis systems can provide highly treated water at a dedicated drinking water tap and may address a broader range of dissolved contaminants, depending on the system and its certification. Lead reduction requires particular attention because not every filter is designed or certified for that purpose.

For a whole-home system, reviews should describe performance throughout the house. If hard water is the concern, a properly sized water softener can help reduce scale, improve soap performance, and protect water-using equipment. If the issue is sediment, iron, manganese, sulphur odour, or tannins, a specialized treatment system may be needed before water reaches fixtures and appliances.

A review that simply says, “It works,” is a starting point. A review explaining that a well-water system eliminated rotten-egg odour, reduced staining, maintained strong water pressure, and received timely service is far more useful.

Match the System to the Water Problem

There is no single “best water filter” for every Ontario property. The correct system depends on water source, test results, household size, plumbing, and daily water demand.

Municipal Water Concerns

Municipal water is treated before it reaches the home, but homeowners may still notice chlorine taste, odour, sediment, or concerns about older pipes and lead exposure. A whole-home carbon filter can improve water quality at every fixture, while a reverse osmosis system can provide additional treatment for drinking and cooking water. Homes with older plumbing should consider a professional assessment and choose equipment specifically rated for the contaminants they want to reduce.

Hard Water and Scale

Hard water is one of the most common reasons Ontario homeowners seek treatment. It can leave white residue on fixtures, reduce the efficiency of water heaters, and shorten the service life of dishwashers, washing machines, and other appliances. A water softener is not the same as a basic drinking water filter. Reviews should make that distinction clear.

When reading feedback on softeners, look for comments about reduced spotting, easier cleaning, softer laundry, and reliable regeneration. Also consider maintenance expectations. Salt-based softeners require salt replenishment, while alternative scale-control equipment may suit certain applications but does not remove hardness minerals in the same way.

Well Water and Rural Properties

Private wells require a more careful approach because water quality can change with seasons, groundwater conditions, and nearby land use. Sediment, bacteria, iron, manganese, sulphur, hardness, and pH issues may occur separately or together. A review for a single filter is rarely enough to guide a well-water decision.

Testing should come first. From there, a treatment plan may include sediment filtration, iron and sulphur removal, water softening, ultraviolet disinfection, or other specialized equipment. If bacteria are a concern, ultraviolet treatment must be paired with adequate pre-filtration so the UV system can operate effectively. The goal is a dependable treatment train, not a collection of devices selected from online ratings.

Lake Water, Commercial, and High-Use Applications

Cottages, lake-water properties, restaurants, schools, hotels, healthcare facilities, and multi-unit buildings need systems designed for their actual flow rates and water conditions. Residential reviews may not reflect the demands of a property with multiple washrooms, commercial kitchens, laundry equipment, or continuous occupancy.

For these applications, look for evidence that the provider can assess water chemistry, peak demand, storage needs, regulatory requirements, and maintenance access. Equipment that performs well at a kitchen sink may be completely unsuitable for a high-flow building. Engineered design and professional installation matter more as complexity increases.

Warning Signs in Filter Reviews

Be cautious when a review promises that one small device removes every possible contaminant without testing, maintenance, or limitations. Water treatment has real trade-offs. Filters have service lives. Reverse osmosis membranes need replacement. UV lamps require scheduled changes. Softeners need salt or servicing. Any provider claiming that maintenance is never required deserves closer scrutiny.

It is also wise to question reviews focused only on the lowest purchase price. An inexpensive system can become costly if it is undersized, difficult to service, uses proprietary replacement filters, or fails to solve the underlying issue. The installed cost should be considered alongside expected maintenance, warranty terms, replacement media, water use, and the protection provided to plumbing and appliances.

Finally, separate product dissatisfaction from installation dissatisfaction. Poor water pressure, leaks, noise, or inconsistent results may indicate a sizing or installation issue rather than a problem with filtration technology itself. Ask whether the reviewer had a water test, whether the system was professionally installed, and how long it has been operating.

Questions to Ask Before You Buy

Before choosing a system based on reviews, ask what specific contaminants or conditions it is designed to address, what its tested flow rate is, and what maintenance it requires. Confirm whether it treats the entire home or only one drinking water tap. If the property uses well or lake water, ask for testing and a recommendation based on the results rather than a generic package.

You should also ask who will install and service the equipment. Local support becomes especially valuable when a system needs adjustment, replacement filters, salt delivery, UV lamp changes, or troubleshooting. Canadian Smart Home Solutions helps Ontario property owners identify the source of their water concerns and select treatment equipment that fits the property, not just a product rating.

The most reassuring review is not necessarily the one with the most enthusiastic wording. It is the one from a homeowner or property manager whose water problem matches yours, whose system was properly specified, and whose results continue well after installation. Start with the water you have, then choose the treatment that gives your household or facility a clear, measurable improvement.

Top Reverse Osmosis Features Worth Comparing

A reverse osmosis system can make a noticeable difference at the kitchen tap, but not every unit delivers the same protection, capacity, or day-to-day convenience. When comparing the top reverse osmosis features, look beyond a system’s appearance or price. The right setup should address the contaminants in your water, fit the demands of your household, and remain practical to maintain for years.

For Ontario homeowners, the decision often starts with a concern about drinking water quality: lead from older plumbing, chlorine taste, dissolved minerals, sodium, or water from a private well. Reverse osmosis is highly effective for many dissolved contaminants, but its performance depends on proper system design, filter selection, installation, and maintenance.

Top Reverse Osmosis Features That Matter Most

Contaminant reduction backed by clear performance information

The central purpose of reverse osmosis is to reduce a broad range of dissolved substances in drinking water. A quality system uses a semi-permeable membrane to separate water from many dissolved contaminants. Depending on the system and the condition of the feed water, this may include lead, arsenic, fluoride, nitrates, sodium, total dissolved solids, and other unwanted materials.

However, homeowners should not assume that every reverse osmosis unit reduces every concern to the same degree. Look for clear performance information for the contaminants that matter in your home. If lead is a concern, for example, the system should be selected specifically for lead reduction. If you rely on well water, water testing should guide the recommendation because iron, sulphur, hardness, bacteria, or sediment may need treatment before water reaches the RO unit.

A reverse osmosis system is generally a point-of-use solution, meaning it treats water at a dedicated drinking-water faucet. It does not replace a whole-home water softener, iron filter, UV sterilizer, or sediment filter when those systems are needed elsewhere in the property.

A membrane sized for household demand

Membrane production capacity is commonly expressed in gallons per day. Higher capacity can help a busy household recover more quickly after filling water bottles, cooking, making coffee, or supplying a refrigerator dispenser. A family that uses purified water throughout the day may find a low-capacity system frustrating if the storage tank takes too long to refill.

More capacity is not automatically better. Water pressure, temperature, incoming water quality, and pre-treatment all affect actual production. A properly sized system balances household use with available pressure and the space under the sink. For larger homes, offices, or facilities, a commercial reverse osmosis system may be more appropriate than trying to make a residential unit serve an unusually high demand.

Multi-stage filtration before and after the membrane

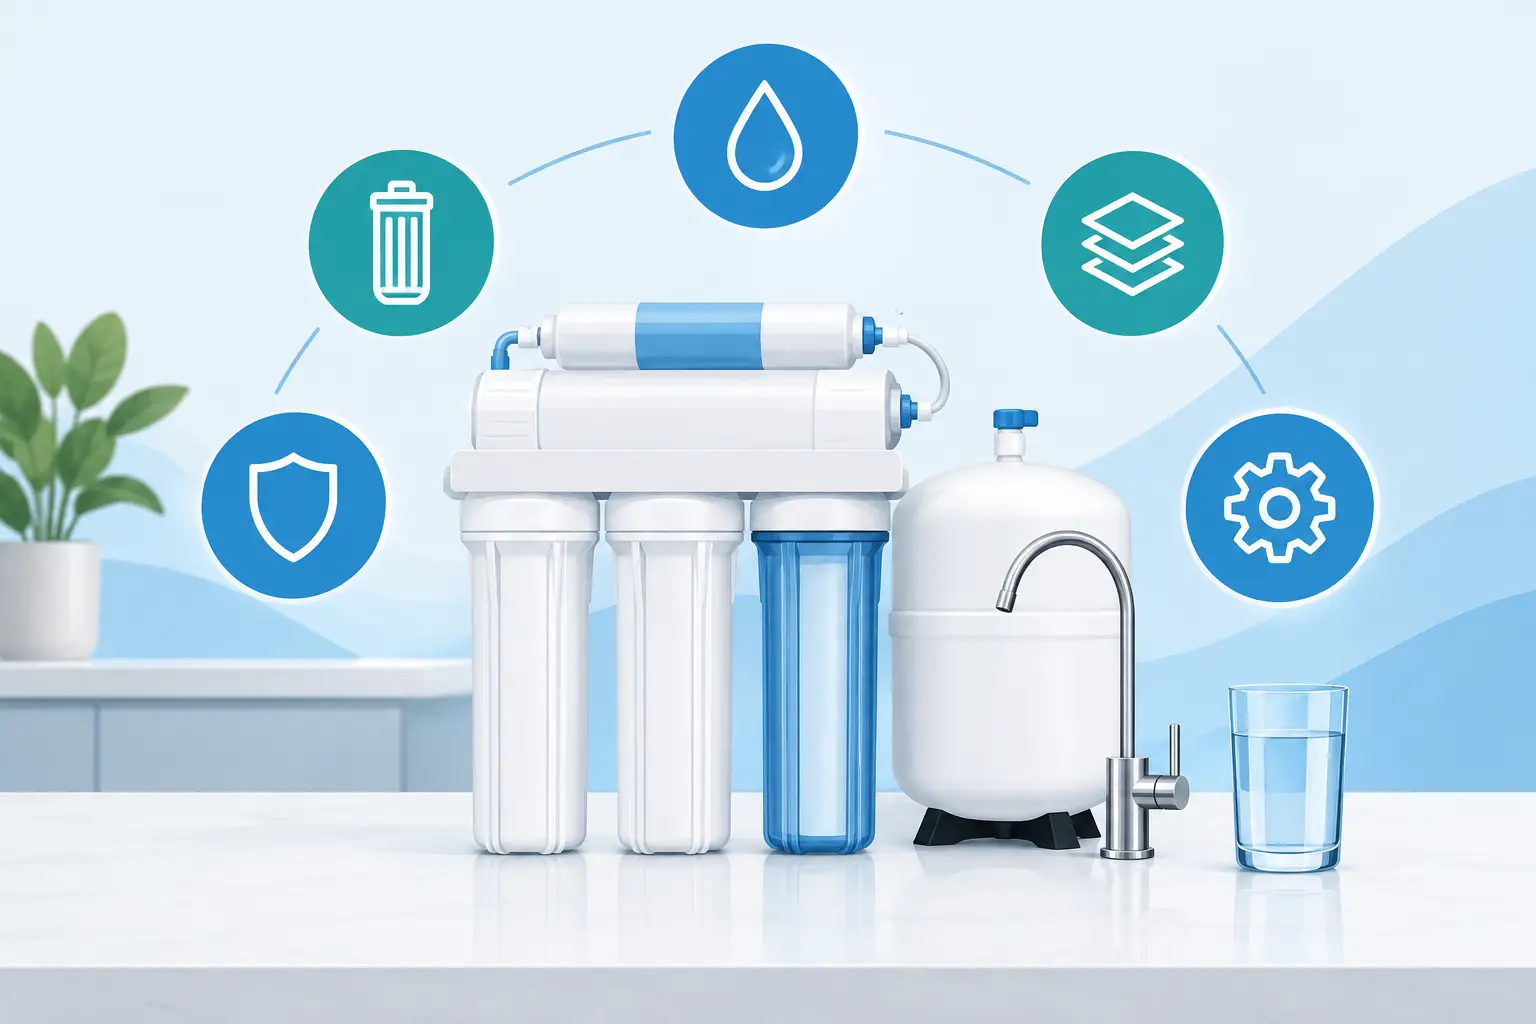
A reverse osmosis membrane needs protection. Sediment and carbon prefilters are not minor add-ons – they help prevent premature membrane fouling and improve the water entering the membrane. A sediment filter captures dirt, rust, and fine particles, while carbon filtration commonly reduces chlorine and improves taste and odour. Chlorine can damage many RO membranes, making an effective carbon stage especially important for municipally supplied water.

A post-carbon filter is also valuable. It polishes water after it leaves the storage tank, helping deliver a cleaner taste at the faucet. Some systems include additional stages for specific purposes, but more stages do not necessarily mean better treatment. Each filter should have a defined job that matches the water analysis and the household’s goals.

Efficient water use and pressure support

Reverse osmosis produces purified water and a separate concentrate stream that carries rejected contaminants away from the membrane. This is normal, but systems vary significantly in how efficiently they use water. For homeowners paying municipal water and wastewater charges, a more efficient design can reduce unnecessary waste over time.

Some systems use a permeate pump or pressure-assisted design to improve membrane performance and reduce the amount of water sent to drain. These features can be particularly helpful where incoming water pressure is lower or where the system must push water to a refrigerator or a faucet located farther away. They can add cost and complexity, so the best choice depends on your plumbing layout and expected use.

Reliable storage and delivery at the faucet

Most under-sink reverse osmosis systems store treated water in a pressurized tank. Tank capacity matters because it determines how much purified water is readily available before the system needs time to replenish it. A practical system should provide enough water for normal household routines without making the cabinet difficult to access or service.

The faucet and tubing deserve attention as well. A dedicated faucet should be durable, easy to operate, and compatible with the kitchen finish. If you want RO water connected to a refrigerator, ice maker, coffee station, or secondary faucet, confirm that the system has sufficient pressure and capacity. Long tubing runs or multiple points of use may require additional design considerations.

Leak protection and dependable installation components

Water treatment equipment should improve your home, not create a cabinet leak. Quality reverse osmosis systems use secure fittings, appropriate shut-off valves, and properly routed drain connections. Leak detection or automatic shut-off features can provide extra protection, especially in finished kitchens, condominiums, or properties where a slow leak could go unnoticed.

Professional installation is valuable because reverse osmosis units connect to the cold-water supply, drain line, storage tank, and dedicated faucet. An installer can confirm that the drain connection is appropriate, protect against cross-connections, maintain access for future service, and identify restrictions that could affect performance. This is also the time to assess whether existing water conditions could shorten filter or membrane life.

Features That Make Maintenance Easier

Every RO system requires service. Filters eventually load with sediment or exhaust their carbon capacity, and membranes have a finite lifespan. A good system makes routine maintenance straightforward rather than turning it into an under-sink plumbing project.

Look for filter housings or quick-change cartridges that can be accessed without removing half the cabinet. Clearly labelled filters, practical shut-off arrangements, and available replacement parts make a real difference over the life of the system. Indicator lights or filter-life monitors can be useful reminders, but they are not a substitute for following the recommended service schedule and responding to changes in water taste, flow, or pressure.

The best maintenance schedule depends on incoming water quality and water use. A home with heavy sediment, high chlorine, or a private well may require more frequent prefilter changes than a home with relatively clean municipal water. Delaying filter changes can reduce water quality, slow production, and place unnecessary strain on the membrane.

When Reverse Osmosis Needs Supporting Treatment

Reverse osmosis is not a cure-all for every water issue. It is designed primarily for purified drinking water, while many Ontario homes have water problems that should be treated before water reaches the kitchen tap.

Hard water can cause scale buildup on fixtures, inside water heaters, and throughout plumbing. A water softener is often the more appropriate whole-home solution for hardness. Iron and manganese can stain fixtures and foul filters, while sulphur can create a rotten-egg odour. These concerns typically call for dedicated iron, sulphur, or oxidation treatment. If microbiological contamination is possible, particularly with private wells or lake water, UV disinfection and proper pre-treatment may be required.

This is why water testing matters. It identifies what is actually present and helps avoid buying a drinking-water system that is asked to solve a whole-home problem. It can also reveal whether an RO system needs specialized pre-treatment or a specific membrane configuration.

How to Compare Systems Before You Buy

Start with your water source and your objectives. Municipal water users may prioritize reducing chlorine taste, lead, and dissolved solids. Well-water households should first understand hardness, iron, manganese, sulphur, bacteria, and nitrate levels. Families with infants, people managing sodium intake, and homeowners in older properties may have additional reasons to seek targeted treatment.

Then compare the practical details: documented contaminant reduction, membrane capacity, storage volume, water-efficiency design, service requirements, available replacement filters, and warranty coverage. Also consider who will install and support the system. A lower upfront price is less attractive if the unit is difficult to service, lacks readily available parts, or is poorly matched to the water supply.

Canadian Smart Home Solutions can help assess the water issue, recommend the appropriate treatment combination, and install equipment designed for dependable long-term use. The goal is not simply to add a filter under the sink. It is to provide drinking water treatment that works properly with the rest of your home’s water system.

A well-chosen reverse osmosis system should give your household confidence each time you fill a glass, prepare a meal, or reach for water from the refrigerator. Begin with a water test and a clear understanding of what you want the system to reduce, then choose features that support reliable performance rather than unnecessary extras.

Well Water Treatment for Ontario Homeowners

An orange ring in the toilet bowl, black marks on fixtures, a rotten-egg smell at the tap, or a kettle that scales up quickly are not simply cleaning problems. They are often signs that your well water needs attention. For Ontario homeowners, a private well can provide a dependable water supply, but water quality can change with weather, groundwater conditions, nearby land use, well age, and the condition of the plumbing.

The right answer is not to buy a filter based on one symptom. Effective treatment starts with testing, then matches the equipment to the water issues actually present. That approach protects your family’s water supply, reduces damage to fixtures and appliances, and avoids spending money on a system that does not address the root cause.

Why Well Water Quality Can Change

Municipal water is treated and monitored before it reaches the home. Private well owners are responsible for understanding and managing their own water quality. Groundwater passes through soil and rock before it enters a well, picking up naturally occurring minerals along the way. Iron, manganese, calcium, magnesium, sulphur compounds, and tannins are common concerns in many Ontario areas.

Other issues are less visible. Bacteria can enter a well after heavy rain, flooding, a damaged well cap, surface runoff, or changes around the wellhead. Nitrates, lead from household plumbing components, and other contaminants may also require testing based on the property, location, and household needs.

A change in water does not always mean an immediate hazard, but it should not be ignored. New odours, staining, cloudiness, a metallic taste, reduced water pressure, or repeated appliance problems are useful signals that it is time to test the supply.

Start With a Complete Well Water Test

Water treatment should be based on a current sample, not a guess or a neighbour’s water report. Wells close to one another can still produce very different results. Water chemistry may also vary between seasons, after prolonged rain, or as groundwater levels shift.

A useful analysis looks at the concerns that affect safety, comfort, and equipment performance. This typically includes bacteria, hardness, pH, iron, manganese, sulphur, turbidity, and total dissolved solids. Depending on the property, testing may also include nitrate, lead, tannins, sodium, arsenic, or other parameters recommended for the area.

Bacterial testing deserves particular attention. A clear glass of water can still contain microorganisms that should be addressed. If bacteria are detected, the well itself may need inspection, disinfection, or repair before relying on a treatment device alone. An ultraviolet sterilizer is often an effective final barrier for microbiological control, but it performs best when sediment and cloudiness have already been removed.

For a private well, testing is especially sensible after flooding, a repair to the well or plumbing, a noticeable change in taste or smell, or any concern about contamination. Households with infants, older adults, or people with compromised immune systems should be particularly careful about maintaining reliable water quality.

Common Well Water Problems and What They Mean

Hard water contains elevated calcium and magnesium. It is not usually obvious from the tap, but it leaves white scale on faucets, shower doors, dishes, heating elements, and plumbing fixtures. It can reduce soap performance, make laundry feel stiff, and force water heaters and appliances to work harder. A properly sized water softener exchanges hardness minerals for sodium or potassium, reducing scale throughout the home.

Iron is one of the most familiar well water issues. Clear water may turn orange or brown after it sits, and iron can stain toilets, sinks, clothing, and driveways. Manganese may cause darker brown or black staining. The appropriate removal system depends on the form and concentration of the metals, as well as pH, water flow, and whether iron bacteria are present. A basic cartridge filter is rarely a long-term answer to significant iron staining.

Sulphur-related odours are often described as rotten eggs. The smell may be caused by hydrogen sulphide gas, sulphur bacteria, or, in some cases, the water heater. Treatment can involve oxidation, specialized filtration, or equipment that removes both odour and iron. The best option depends on where the odour occurs and what testing shows.

Low pH water can be acidic and may contribute to corrosion, blue-green staining, pinhole leaks, or metallic taste. High pH water can also affect treatment performance. Correcting pH may be necessary before iron removal, softening, or ultraviolet treatment can perform as intended.

Building the Right Well Water Treatment System

Most homes with well water need more than one stage of treatment, but the sequence matters. Equipment should be designed around the test results, household water use, plumbing layout, and peak flow demand. A system that works for a two-person bungalow may not be adequate for a busy family home with multiple bathrooms, a large soaking tub, and irrigation needs.

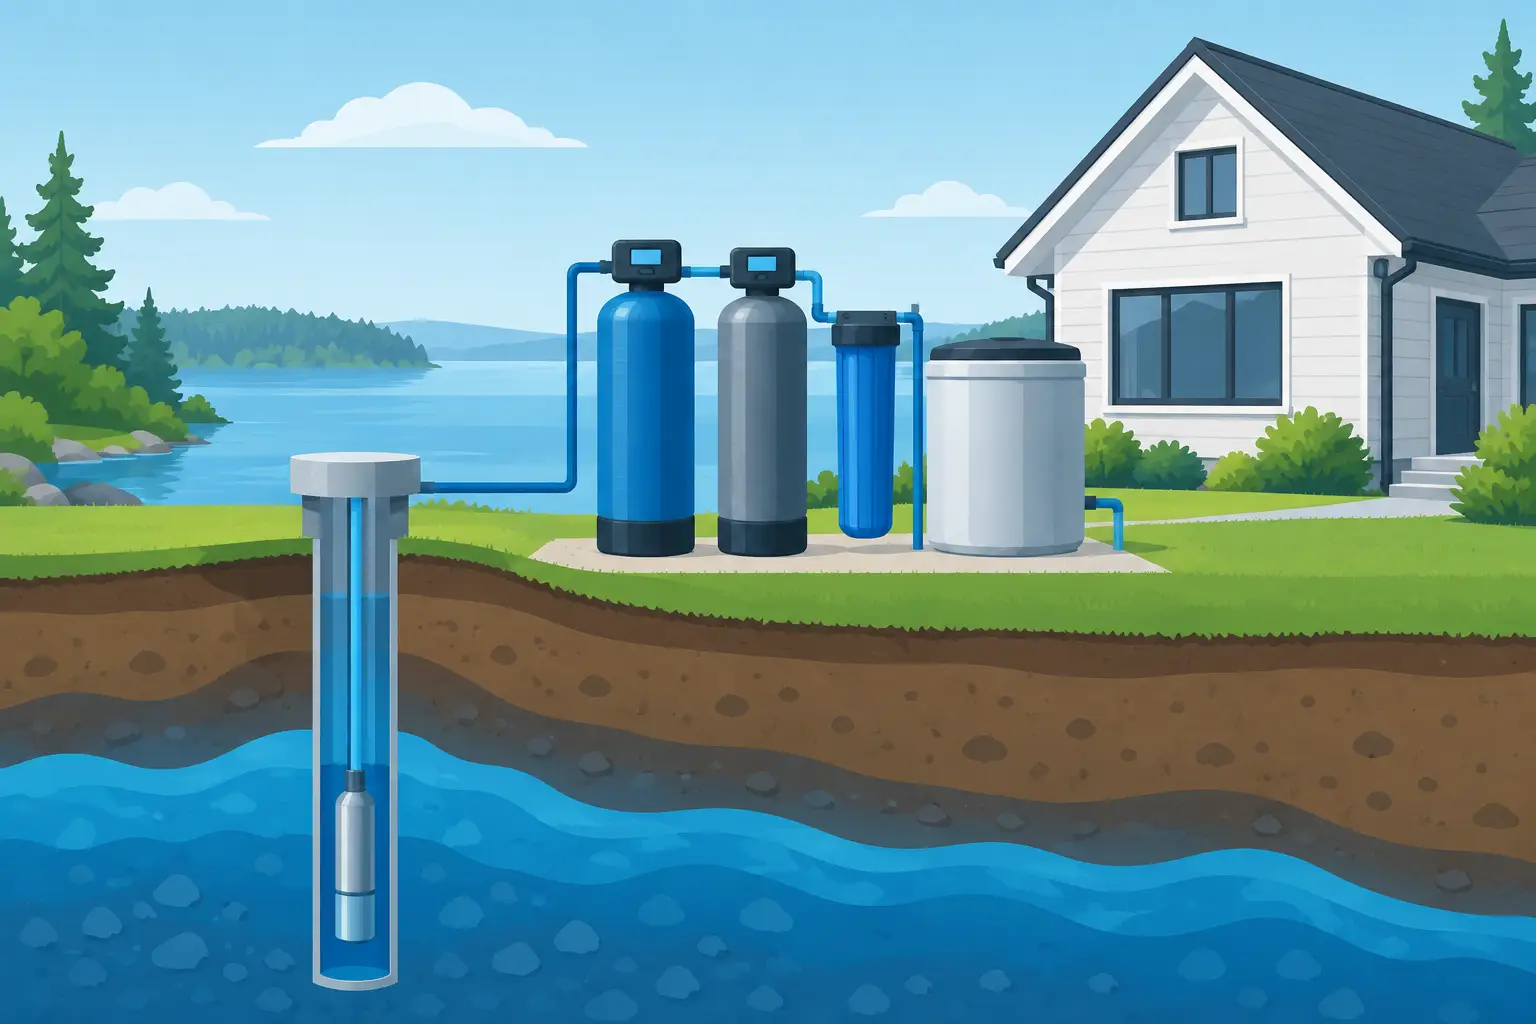
A typical whole-home arrangement may begin with sediment filtration to protect valves and downstream equipment. Depending on the water, this can be followed by iron and sulphur removal, pH correction, a water softener, and ultraviolet disinfection. Drinking water treatment at the kitchen sink may include reverse osmosis when homeowners want an additional level of reduction for specific dissolved contaminants or improved taste.

There is no universal order that suits every property. For example, ultraviolet equipment should generally receive clear water, because sediment can shield microorganisms from the UV light. Iron removal may need to come before softening, although certain water conditions allow a combined approach. The equipment must also be sized for the home’s real flow rate, not only for the number of people living there.

This is where professional water analysis and installation make a practical difference. Canadian Smart Home Solutions designs whole-home well water systems around the conditions at the property, helping homeowners avoid undersized equipment, incorrect filter selection, and treatment trains that create more maintenance than results.

Do Not Treat Symptoms in Isolation

It is tempting to solve one visible problem at a time. An inexpensive filter may reduce sediment temporarily, while stain remover may hide iron marks for a few days. But these measures do not protect plumbing, reduce operating costs, or confirm that the water is suitable for household use.

A better approach considers the entire water supply. If a home has hard water and iron, installing only a softener may improve scale but leave staining. If an ultraviolet unit is added to water with heavy sediment, the system may not provide consistent disinfection. If a reverse osmosis system is installed without addressing odours or hardness at the source, the homeowner may still have unpleasant water in every shower, laundry load, and appliance.

Whole-home treatment focuses on the water used throughout the property, while point-of-use systems serve a specific tap. Both can have a place, but they solve different problems. The best setup depends on the test results and what the homeowner wants to improve first: safety, staining, odour, scale, drinking-water taste, or all of the above.

Maintenance Keeps Treatment Working

Even well-designed water treatment equipment needs service. Filters need replacement, softeners require salt or potassium, ultraviolet lamps need scheduled replacement, and certain media systems need cleaning or periodic inspection. Neglecting maintenance can reduce water flow, allow staining to return, or limit the effectiveness of disinfection equipment.

Homeowners should also pay attention to changes after installation. If water begins to smell different, pressure drops, salt use changes unexpectedly, or stains return, the system may need adjustment or service. Keeping a record of test results, service dates, and any noticeable changes makes it easier to identify patterns over time.

The goal is not complicated water treatment for its own sake. It is dependable water that does not stain fixtures, damage appliances, smell unpleasant, or leave you uncertain every time the tap is turned on. Start with a current water test, address the cause rather than the symptom, and choose equipment that is built for your home’s water and daily demand.

Softener Bypass Installation That Protects Plumbing

A water softener should make life easier, not leave a home without water when it needs attention. A properly planned softener bypass installation gives you control over the system, allowing water to continue moving through the home while the softener is serviced, repaired, or temporarily taken offline. For Ontario homeowners dealing with hard water, scale, staining, and appliance wear, it is a small plumbing detail with a major practical benefit.

The bypass is not an optional cosmetic add-on. It is part of a serviceable, dependable whole-home water treatment installation. It protects access to water during maintenance and makes it easier for a technician to diagnose a softener issue without disrupting the entire household.

What a Water Softener Bypass Does

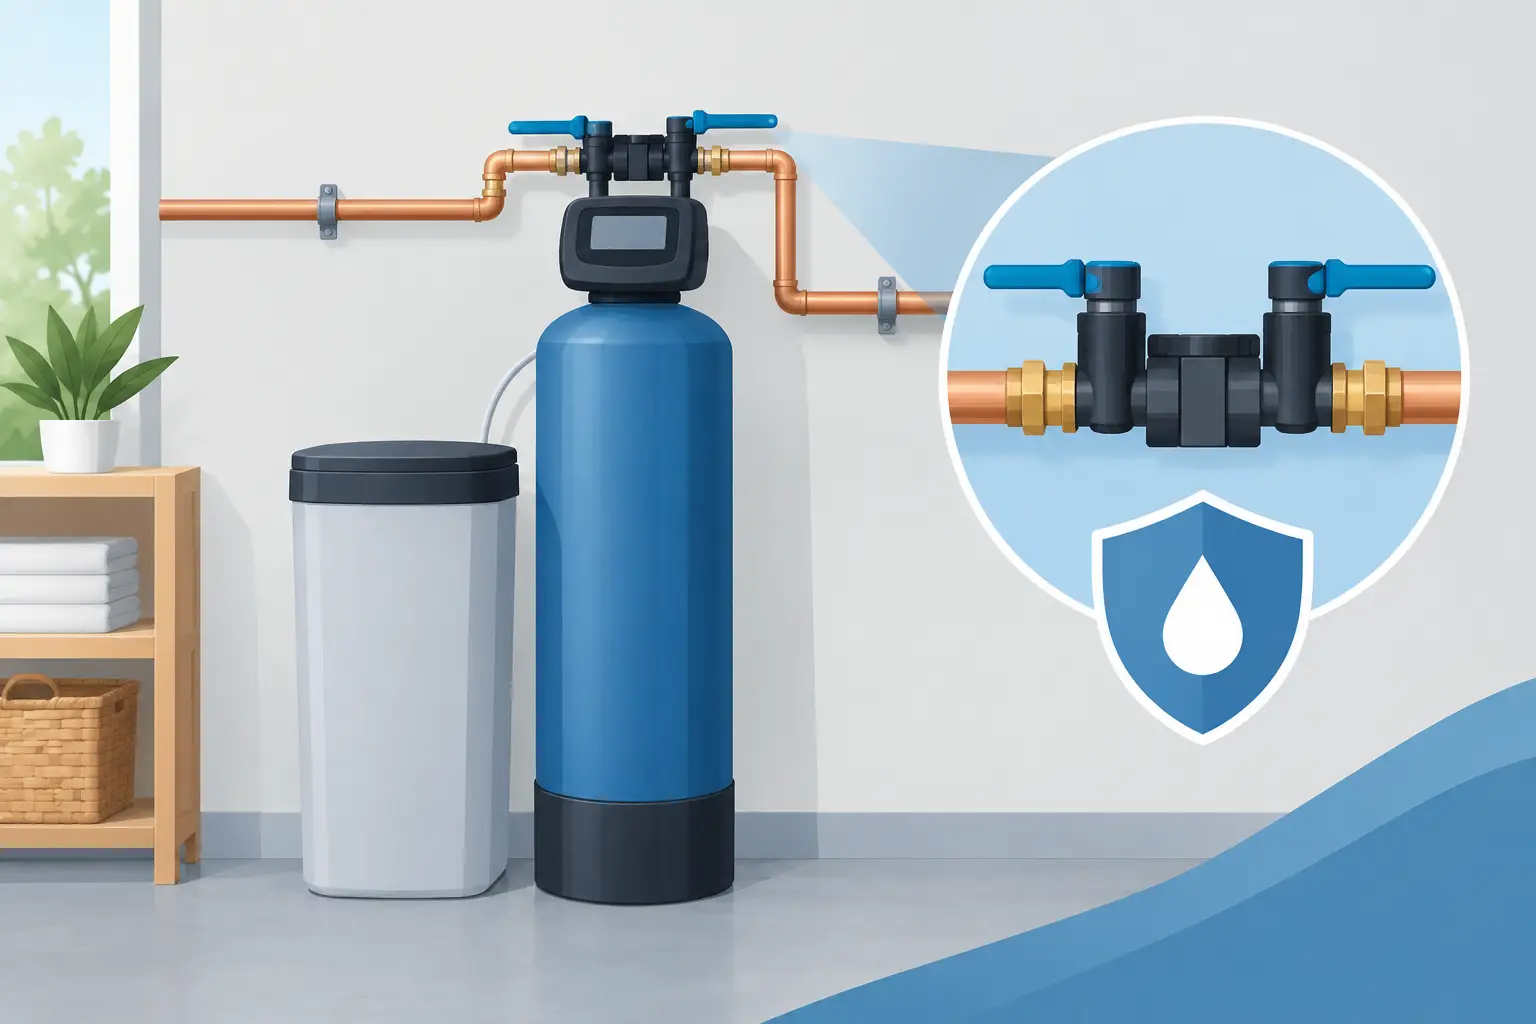
A bypass is a plumbing arrangement installed around the water softener. In normal operating mode, incoming water flows through the softener before supplying fixtures and appliances. When the softener needs to be isolated, the inlet and outlet to the unit are closed and the bypass route is opened. Water then travels around the system and continues to the home.

Most installations use a three-valve configuration: one valve on the incoming line, one on the outgoing line, and one on the connecting bypass line. Many modern softeners also include an integrated bypass valve at the control head. Either approach can work well when it is sized correctly, accessible, and installed in the right location.

The key distinction is that bypassed water is not softened. It still contains the minerals responsible for hardness, including calcium and magnesium. That is acceptable for a short period during servicing, but it is not a long-term solution for a home that relies on softened water to control scale.

Why Softener Bypass Installation Matters

Hard water can leave deposits on faucets, shower glass, dishwashers, water heaters, and other equipment. A softener reduces that mineral load, but like any mechanical water treatment system, it needs occasional maintenance. Salt must be checked, settings may need adjustment, and components can eventually require service.

Without a bypass, even routine work can require shutting off the main water supply. That can interrupt showers, laundry, food preparation, cleaning, and business operations. In a busy home, rental property, restaurant, office, or small commercial facility, the inconvenience adds up quickly.

A bypass also makes emergency response safer and faster. If a softener develops a leak, a control valve fails, or a component needs replacement, the system can be isolated while water remains available elsewhere in the building. This is particularly valuable where there are occupants, vulnerable residents, customers, or high daily water demand.

There is a trade-off. Running on bypass for an extended time means untreated hard water returns to the plumbing system. If the property also has iron, sulphur odour, sediment, bacteria concerns, or other water quality issues, the effect depends on where each treatment component sits in the overall system. A bypass should therefore be planned as part of the complete treatment layout, not added without considering the water source and equipment sequence.

Planning a Softener Bypass Installation

The best location is generally on the main cold-water line after the water meter, pressure tank, or well equipment and before the water branches to the rest of the building. The exact position depends on whether the property has pre-filtration, iron removal, ultraviolet disinfection, reverse osmosis, or a dedicated untreated cold-water line.

For example, a home with well water may need sediment filtration and iron or sulphur treatment ahead of the softener. The bypass arrangement must preserve the intended flow path and avoid sending untreated water through equipment that requires pre-treated water. A city-water home with chlorine or lead concerns may have a different layout again.

Accessibility matters as much as pipe routing. Valves should be easy to reach, clearly identified, and positioned where they can be operated without moving salt bags, storage items, or other equipment. The softener itself needs room for salt loading, drain-line inspection, control-head service, and future replacement.

Correct sizing is another important consideration. Undersized valves or restrictive fittings can reduce flow and cause noticeable pressure loss at showers or high-demand fixtures. This is especially relevant for larger homes, multi-unit properties, hotels, schools, and facilities with commercial water treatment systems. The bypass should match the service line size and expected flow rate.

A professional installer will also confirm suitable drainage, an approved air gap where required, secure pipe supports, shutoff placement, and protection from freezing. Ontario plumbing requirements and local municipal rules can affect the installation, particularly in commercial or institutional applications. A system that appears to work can still create maintenance, drainage, or compliance issues if these details are overlooked.

Softener Bypass Installation: The Correct Process

The process begins with an assessment of the existing plumbing and water treatment equipment. Before pipe is cut, the installer should identify the direction of water flow, the building’s main shutoff, pipe material, water pressure, drain location, and any equipment that must remain in service.

The water supply is then shut off and pressure is relieved at a nearby fixture. The softener is isolated and the piping is prepared for the chosen bypass configuration. Depending on the property, the installation may use copper, PEX, CPVC, or another approved material compatible with the existing plumbing and local requirements.

After the valves and bypass line are installed, the plumbing is secured and the system is returned to service gradually. The installer checks each connection for leaks, confirms that water flows through the softener in service mode, and verifies that the bypass route delivers water when the softener is isolated.

Valve positions should be demonstrated before the job is complete. In service mode, the softener inlet and outlet are open while the bypass valve is closed. In bypass mode, the softener inlet and outlet are closed while the bypass valve is open. Getting this sequence wrong can stop water flow, send water through the wrong route, or leave the system partly isolated.

The final step is to run water at several fixtures and inspect the system under normal pressure. If the softener has been disconnected or opened for service, it may also need to be regenerated, reset, or programmed based on the home’s water hardness and household demand. A bypass works best when the treatment system itself is correctly sized and configured.

When to Call a Water Treatment Professional

A homeowner may be comfortable identifying the bypass handle or checking for visible leaks, but installation is not always a simple do-it-yourself task. Professional service is the sensible choice when the main water line must be altered, the plumbing is older, drainage needs to be added, or the softener is part of a larger filtration system.

It is also advisable when water quality concerns go beyond hardness. Iron staining, rotten-egg odour, cloudy water, lead, bacterial risk, and well-water changes require more than a valve arrangement. Water testing and a proper system review help ensure that bypassing one component does not create a new issue elsewhere.

Canadian Smart Home Solutions can assess the water source, existing plumbing, household demand, and treatment equipment to recommend a practical layout for Ontario properties. The goal is not simply to fit a softener into a utility room. It is to provide dependable treated water while keeping the system accessible for the years of service ahead.

Using Your Bypass Without Creating New Problems

Use bypass mode for planned maintenance, repairs, or a confirmed softener fault. Once the work is complete, return the valves to service mode promptly and confirm the softener is operating normally. If water feels different, scale begins appearing again, or the system has been bypassed for more than a short period, arrange service rather than assuming the issue will correct itself.

Keep the bypass area clear, label the valve positions if needed, and make sure other adults in the property know how to isolate the softener in an emergency. That simple preparation can prevent a minor equipment issue from becoming a stressful interruption to the water supply.

A well-installed bypass gives you options when they matter most: water remains available, the softener can be serviced properly, and your plumbing is better prepared for the realities of long-term water treatment.

School Chlorine Reduction Example: A Practical Plan

A school chlorine reduction example starts with a common complaint: students avoid the water fountains because the water smells like a pool, while staff notice the same taste in coffee, cooking, and bottle-filling stations. The solution is not to remove treatment blindly. It is to identify what is in the water, where the concern occurs, and how to reduce chlorine or chloramine effectively without creating new water-quality risks.

For Ontario schools, water treatment decisions must balance taste, safety, building plumbing conditions, daily demand, and maintenance capacity. A properly designed system can improve the drinking experience for students and staff while helping the facility team manage water quality with confidence.

A School Chlorine Reduction Example in Practice

Consider a mid-sized Ontario elementary school served by municipal water. The building has 450 students and staff, several drinking fountains, two bottle-filling stations, a staff kitchen, a cafeteria, and a gym change-room area. The school receives water that meets municipal treatment requirements, but occupants report a noticeable chlorine odour, particularly first thing in the morning and after weekends.

The facilities manager initially considers installing small filters at individual fountains. That approach may help at one or two locations, but it does not address the cafeteria, kitchen, staff areas, or water used in food preparation. It also creates a maintenance challenge: every filter needs to be tracked and changed on schedule.

A more practical approach begins with water testing at the incoming service and at representative outlets throughout the school. Testing should confirm whether the disinfectant is free chlorine, chloramine, or a combination of related compounds. This distinction matters because standard carbon filtration can be very effective for chlorine, while chloramine reduction usually requires specific catalytic carbon media, adequate contact time, and correct flow control.

In this example, testing confirms that the municipal supply contains chloramine residual. Results also show that chlorine-related taste and odour are strongest at the bottle-filling stations after water has sat in portions of the building plumbing. The school does not have a municipal water safety failure. It has an occupant-experience issue that requires a targeted treatment design.

Why Schools Should Not Simply Remove All Disinfectant

Chlorine and chloramine are used by municipalities for an important reason: they help control microbial growth as water travels through distribution pipes. A school should not treat chlorine reduction as a simple removal project, especially when considering whole-building treatment.

If a large central carbon system strips disinfectant from every water line, the building may have less residual protection in its internal plumbing. That can be a concern in older buildings, buildings with infrequent-use fixtures, or facilities that sit mostly empty during holidays and summer breaks. Stagnant water management, flushing procedures, temperature control, and plumbing condition all affect the outcome.

For that reason, many schools are best served by treating water at the point of use rather than immediately after it enters the building. This means reducing chlorine or chloramine at the locations used for drinking, cooking, and food service while maintaining the municipal disinfectant residual in most of the building plumbing.

The right approach depends on the school layout and water-use pattern. A smaller school with two bottle fillers may need high-capacity point-of-use filtration. A large campus with a central kitchen and many drinking locations may benefit from a dedicated filtered-water loop or a commercial treatment system serving selected areas. A water treatment professional should assess the building before recommending either option.

The Recommended System for This Example

In this school chlorine reduction example, the recommended design is a commercial point-of-use solution serving the two bottle-filling stations, cafeteria kitchen cold-water line, and staff kitchen drinking-water tap. Each treatment point uses a properly sized catalytic activated carbon filter designed for chloramine reduction.

Catalytic carbon is selected because it is more suitable than basic granular activated carbon when chloramine is present. The system is sized around actual peak flow, expected daily consumption, water pressure, and required contact time. Oversizing is not wasteful when it provides dependable performance during busy lunch periods and reduces the chance of pressure loss at bottle-filling stations.

Where a bottle-filling station has high demand, the treatment assembly can include a sediment prefilter to protect the carbon media from particulate loading. A pressure gauge and scheduled maintenance record help the facilities team see when service is required. If testing identifies microbiological concerns related to building plumbing, ultraviolet treatment may be considered as an additional safeguard at specific drinking-water locations. UV does not remove chlorine or chloramine, however, so it is not a substitute for carbon filtration.

The cafeteria may also require a separate approach. If the kitchen uses water for food preparation, beverages, ice machines, and steam equipment, the system should be designed around those individual uses. Chlorine reduction can improve beverage taste and protect some equipment, but hardness, scale, lead, sediment, iron, or other water-quality concerns may require additional treatment.

Testing Determines the Scope of the Project

A reliable design is based on more than a chlorine reading. Before installation, the school should review free chlorine or total chlorine, pH, hardness, turbidity, temperature, pressure, and flow rate. Lead testing should also be considered where plumbing age, fixtures, or school water management plans indicate a potential concern.

This matters because one issue can affect another. For example, a carbon filter may improve taste but will not solve lead released from aging fixture components. A reverse osmosis system can reduce a broader range of dissolved contaminants at a dedicated drinking station, but it produces water more slowly and requires storage or careful sizing for high-volume use. A water softener can reduce scale in kitchen and mechanical equipment, but it does not provide chlorine reduction.

The best school water-treatment plan often combines technologies only where they are needed. That keeps capital costs, operating costs, and service requirements aligned with the actual problem.

Installation Details That Protect School Operations

School installation should be planned around instructional schedules and food-service requirements. Commercial equipment needs accessible shut-off valves, bypass arrangements where appropriate, adequate drain connections for systems that require them, and enough room for filter changes without disrupting building operations.

For this example, installation is scheduled over a weekend. The contractor isolates the selected drinking-water branches, installs the treatment equipment in serviceable utility spaces, and confirms flow and pressure at each endpoint. The bottle fillers are flushed according to the equipment manufacturer’s requirements before being returned to service.

After installation, water is tested again at the drinking points. The goal is to confirm the intended reduction in chlorine or chloramine taste and odour while ensuring the system is operating within its design flow range. Staff should receive a simple maintenance schedule that identifies filter-change intervals, inspection requirements, flushing procedures, and the person responsible for recording service.

Maintenance Is What Keeps Water Quality Consistent

A commercial carbon system does not perform indefinitely without attention. As media becomes exhausted, chlorine or chloramine reduction declines. In some cases, flow may also decrease as prefilters collect sediment. Waiting until occupants complain again is not an effective maintenance plan.

Filter replacement frequency depends on water chemistry, volume used, system capacity, and peak demand. A school should follow the calculated service interval and confirm performance through periodic testing. Summer shutdowns and long holidays also deserve attention. Flushing selected fixtures before reopening helps replace stagnant water, while regular use of bottle fillers and kitchen taps supports better turnover.

Facilities teams should also protect the system from unauthorized adjustment. Clear labels, service records, and trained maintenance contacts prevent a well-designed installation from becoming an overlooked piece of equipment in a mechanical room.

Choosing Between Whole-Building and Point-of-Use Treatment

Whole-building chlorine reduction may make sense for certain institutional facilities, particularly when a central kitchen, residence area, or specialized process needs treated water throughout a defined zone. However, it requires a careful plumbing-risk assessment and a documented plan for managing water quality after disinfectant residual is reduced.

For many elementary and secondary schools, point-of-use or point-of-entry treatment for selected drinking-water areas is the more controlled option. It focuses the investment where students and staff experience the problem most directly. It also avoids treating large volumes of water used for toilets, janitorial sinks, irrigation, and other non-drinking purposes.

Canadian Smart Home Solutions can help schools assess water-test results, demand patterns, plumbing conditions, and treatment options before selecting commercial equipment. The objective is not to install the largest system. It is to install the right system, with the right capacity and service plan, for dependable results.

Better-tasting water can encourage students and staff to use school drinking stations more often, but the lasting benefit comes from a design that respects both water quality and the realities of the building. Start with testing, treat the locations that matter most, and maintain the equipment as carefully as the people who rely on it every day.

How to Disinfect Private Well Systems Safely

A private well can look perfectly normal while carrying bacteria that make people sick. That is why homeowners need to know when to disinfect private well systems, what the process can realistically solve, and when disinfection is only the first step toward a lasting water-quality solution.

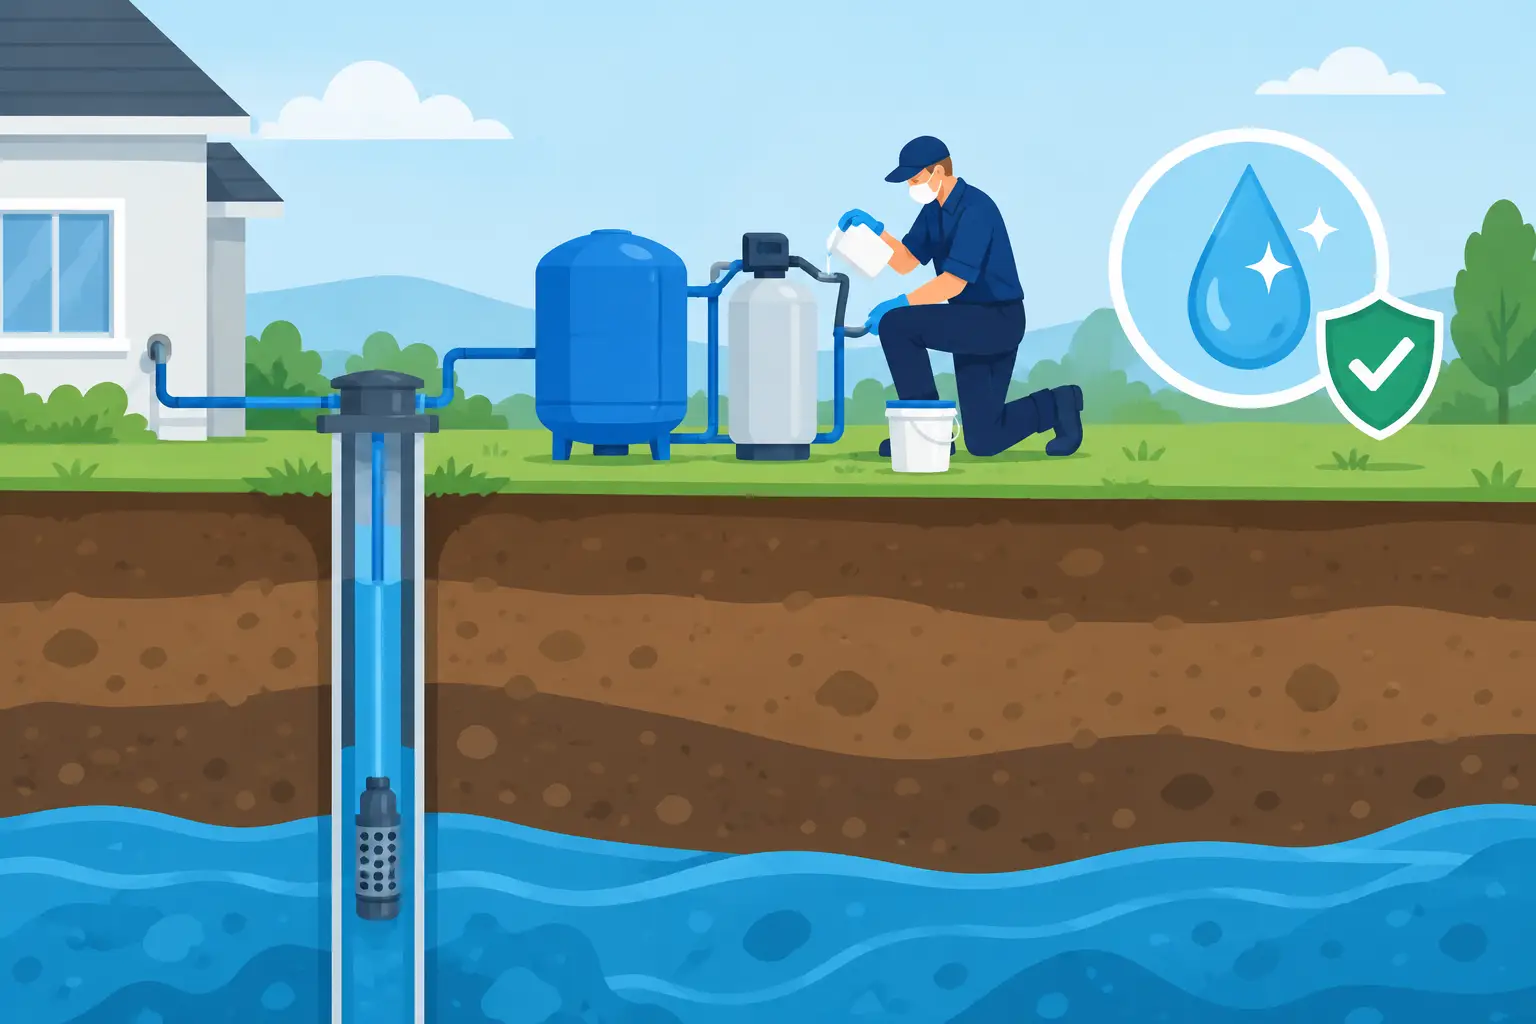
Well disinfection, often called shock chlorination, is designed to kill bacteria in the well, pressure tank, plumbing, and fixtures. It is commonly needed after a positive bacteriological water test, flooding, well repairs, pump replacement, or any event that could introduce surface contamination. It is not a substitute for finding and correcting the source of recurring contamination.

When a Private Well Needs Disinfection

A laboratory water test is the clearest reason to disinfect. Ontario well owners should pay particular attention to total coliform and E. coli results. Total coliform bacteria indicate that the well or plumbing system may be vulnerable to contamination. E. coli is more serious because it can signal contamination from human or animal waste and requires prompt action.

Disinfection is also sensible after work that opens the well system. Replacing a pump, servicing a pressure tank, installing a new well cap, or repairing a broken water line can allow bacteria into the system if tools, equipment, or hands come into contact with water-bearing components. Heavy rain, flooding, or standing water around the well head can create the same risk.

Changes in taste, odour, or appearance deserve attention, but they do not automatically mean bacteria are present. A sulphur smell may be caused by hydrogen sulphide, sulphur bacteria, or reactions in a water heater. Orange staining can point to iron, while black staining may involve manganese. These issues often need dedicated filtration or oxidation equipment in addition to, or instead of, a one-time disinfection.

What Shock Chlorination Can and Cannot Do

Shock chlorination uses a carefully calculated chlorine dose and contact time to disinfect the complete household water system. The chlorine must reach every cold-water fixture, outside tap, and section of plumbing. After the required contact period, the system is flushed until chlorine is gone, then the water is retested.

The process can be highly effective when contamination is isolated and the well is structurally sound. For example, bacteria introduced during a pump repair may be eliminated with proper disinfection and flushing. It can also help address nuisance slime-producing bacteria in some wells.

However, recurring bacteria are a warning that chlorine alone may not resolve the problem. A damaged casing, missing or loose well cap, poor grading around the well, cracked sanitary seal, nearby surface runoff, or an improperly located septic system can continually reintroduce contamination. In that situation, repeated shock chlorination can become expensive, inconvenient, and frustrating without making the water reliably safe.

Chlorine also does not remove lead, hardness, nitrates, pesticides, dissolved iron, manganese, or other chemical contaminants. A water analysis should guide the treatment plan. The right solution may involve well repairs, sediment filtration, iron and sulphur removal, reverse osmosis for drinking water, or an ultraviolet sterilizer for ongoing disinfection.

Before You Disinfect Private Well Systems

Start by protecting the household and collecting useful information. If E. coli is detected or there is a suspected sewage or floodwater intrusion, do not use the water for drinking, preparing food, brushing teeth, making ice, or washing produce until you have followed advice from your local public health authority. Boiling may be appropriate for short-term microbial safety, but it does not correct the well itself.

Inspect the area around the well before adding chlorine. The cap should fit tightly and sit above grade. The casing should not be cracked, bent, or exposed to pooling water. Surface drainage should move away from the well, not toward it. If the well has been flooded, has visible structural damage, or contains debris, professional assessment is the safer starting point.

You should also identify water treatment equipment connected to the home. Activated-carbon filters, reverse osmosis membranes, ultraviolet units, water softeners, and certain specialty media can be affected by high chlorine concentrations. Some equipment may need to be bypassed, isolated, or serviced after the procedure. Check the manufacturer instructions or ask a treatment professional before proceeding.

A Safe Approach to Well Disinfection

The exact amount of chlorine depends on the well diameter, total water depth, static water level, plumbing volume, and treatment equipment. Guessing is not a good practice. Too little chlorine may not disinfect the system; too much can create excessive fumes, damage components, and take much longer to flush.

A proper process generally follows these stages:

  1. Calculate the system volume and chlorine dose. This includes the water column in the well and the household plumbing. Use an approved calculation method based on accurate well dimensions.
  1. Introduce the disinfectant safely. Use an appropriate unscented household bleach or a water-well disinfection product. Never mix chlorine with acids, ammonia, cleaners, or any other chemical. Wear appropriate protective equipment and keep the area ventilated.
  1. Circulate chlorinated water through the well and plumbing. Water is typically recirculated at the well, then each cold-water fixture is opened until a chlorine smell is present. Hot-water plumbing may need separate consideration, particularly where treatment equipment or sensitive appliances are installed.
  1. Allow adequate contact time. The system is left unused for the required period so chlorine can disinfect the well and pipes. Plan ahead because this can mean going without normal water use overnight or longer.
  1. Flush responsibly and retest. Chlorinated water should not be discharged into a septic system, fish-bearing water, or areas where it can harm vegetation. Once chlorine has been flushed from the system, submit a follow-up sample to an accredited laboratory.

Because every well is different, homeowners should treat these stages as a framework, not a substitute for site-specific instructions. Older drilled wells, dug wells, cistern-fed systems, and properties with extensive treatment equipment often need a more tailored approach.

Why Retesting Matters More Than the Chlorine Smell

A chlorine smell only proves that disinfectant moved through the plumbing. It does not prove the bacteria are gone. Follow-up sampling is the only reliable way to confirm whether disinfection worked.

For a meaningful result, take the sample after the chlorine has fully cleared and according to the laboratory’s collection instructions. Avoid sampling from a swivel faucet or a tap with an aerator if the lab advises against it. Use a clean, cold-water tap that is not connected to a point-of-use filter, and deliver the sample within the required time.

If the retest is clear, continue regular testing. Many Ontario well owners test at least several times a year and after major weather events, construction, plumbing work, or changes in water quality. If bacteria return, stop treating the symptom alone and investigate the cause.

When Ongoing Treatment Is the Better Answer

Some properties need more than periodic shock chlorination. An ultraviolet sterilizer can provide continuous protection against bacteria and other microorganisms after water has been properly prefiltered. UV is especially useful where a well has an ongoing vulnerability that cannot be immediately eliminated, but it requires clear water and routine lamp and sleeve maintenance to perform properly.

For homes with iron, sediment, sulphur odours, or hardness, pretreatment matters. Sediment can shield microorganisms from UV light. Iron can foul treatment equipment and create staining throughout the home. Hard water can shorten appliance life and create scale on fixtures, water heaters, and plumbing. A properly designed whole-home system addresses these connected issues rather than treating one problem in isolation.

Canadian Smart Home Solutions can assess well-water results, inspect the treatment needs of the home, and recommend equipment that fits the water chemistry and household demand. This is particularly valuable for larger homes, rental properties, farms, and commercial buildings where undersized or poorly matched equipment can create ongoing service issues.

A well should provide dependable water, not a recurring source of uncertainty. If bacteria keep returning, protect your household by testing promptly and having the well, plumbing, and treatment options evaluated as one complete system.

Water Softener Maintenance Guide for Ontario Homes

A water softener can quietly protect nearly every water-using surface in your home – until it stops doing its job. When soap no longer lathers, white scale returns to faucets, or laundry feels stiff, the system may need attention. This water softener maintenance guide explains what Ontario homeowners should check, how often to check it, and when professional service is the safer choice.

Hard water is common across Ontario, but hardness levels and water conditions vary by municipality, well, and season. A properly maintained softener reduces mineral buildup in plumbing, helps appliances operate more efficiently, and makes cleaning easier. The goal is not complicated upkeep. It is consistent, practical care that keeps the system matched to your household’s water use.

Start With the Salt Tank

The brine tank is where most homeowner maintenance happens. It holds the salt that allows the softener to regenerate and remove hardness minerals such as calcium and magnesium from the resin.

Check the tank about once a month. Salt should generally remain above the water level and should not be allowed to run completely empty. For many homes, keeping the tank about one-third to two-thirds full is a sensible range. Filling it to the top every time is not always better, particularly if your household uses water slowly. Salt stored for long periods can compact, bridge, or become damp in humid conditions.

Use high-quality water softener salt suited to your system and water source. Solar salt crystals are a common choice for many municipal-water homes, while pellet salt often leaves less insoluble residue. If your water contains iron, an iron-fighting salt or approved resin cleaner may be appropriate. The best option depends on the results of a water analysis, not simply what is available at the nearest store.

Avoid using rock salt, which can leave more sediment in the brine tank. Also avoid mixing different salt types without a clear reason. A consistent salt product makes it easier to spot changes in system performance.

Watch for Salt Bridges and Salt Mush

A salt bridge is a hard crust that forms above the water in the tank, creating an empty space below it. The tank may look full, but no salt reaches the water, so the system cannot produce brine correctly. A sudden return of scale or hard-water spotting can be an early warning.

Gently break a bridge with a broom handle or similar blunt tool, taking care not to damage the tank or internal components. Do not use sharp tools. Salt mush is different: it is a thick layer of compacted salt at the bottom of the tank. If it is severe, the tank may need to be emptied, cleaned, and refilled with fresh salt.

Confirm the Softener Is Regenerating Properly

Regeneration is the cleaning cycle that restores the resin beads inside the softener. During this process, the system uses brine to flush collected hardness minerals from the resin and sends the waste water to a drain.

Many modern systems regenerate based on actual water use, which is generally more efficient than a fixed weekly schedule. Others are timer-based. Either design must be programmed correctly for your household size, water hardness, iron level, and water usage. A family of five, for example, will have very different needs than a two-person household.

Check the display periodically for error messages, incorrect time settings, or unusually frequent regeneration. A power outage can reset the clock on some models. If the cycle runs at the wrong time or regenerates too often, it can waste water and salt. If it runs too rarely, hard water can break through before the resin is fully refreshed.

You can also inspect the drain line during a scheduled regeneration. There should be no kinks, leaks, loose connections, or signs of water backing up. Drain line issues can prevent the system from completing its cycle and may create a mess in the mechanical room.

Clean the Brine Tank When It Needs It

A brine tank does not need to be scrubbed every month. In fact, unnecessary cleaning can be inconvenient and may interrupt normal operation. For many homes, cleaning every one to two years is sufficient, although homes with iron, sediment, low-grade salt, or recurring salt mush may need more frequent service.

To clean the tank, allow the salt level to get low, place the system in bypass if recommended by the manufacturer, and remove remaining salt and water. Rinse the tank with clean water and use a mild soap solution if needed. Make sure all soap is thoroughly rinsed out before refilling. If the brine well, float assembly, or tubing appears damaged, do not force it back into place. A service technician can inspect and reassemble these parts correctly.

For households with well water, brine tank cleaning is only one part of the picture. Iron bacteria, sediment, sulphur, and manganese can affect both the softener and other treatment equipment. A system designed for municipal water may not be the right setup for a private well.

Protect the Resin Bed From Iron and Chlorine

The resin bed is the working core of the softener. It attracts hardness minerals as water flows through the tank. Over time, iron can coat the resin and reduce its ability to soften water. Municipal chlorine can also shorten resin life in some conditions.

If your water test shows iron, use a resin cleaner approved for water softeners and follow the product directions carefully. Some cleaners are added to the brine tank before regeneration; others are used during a service procedure. More cleaner is not better. The right product and dosage depend on the type and amount of iron present.

Where chlorine or chloramine levels are a concern, a properly designed whole-home filtration system can protect the softener resin while improving taste and reducing chemical odours. This is one reason a complete water assessment is more valuable than treating a single symptom.

Test Your Water When Performance Changes

Do not rely on feel alone. Soft water can feel different on skin and can make soap more effective, but a hardness test provides clearer information when you suspect a problem.

Test the water before and after the softener if you notice scale returning, spotting on glassware, dry-feeling laundry, or reduced lather. A test can help identify whether the issue is low salt, incorrect programming, exhausted resin, a regeneration problem, or a separate water-quality concern.

If you are on a private well, annual water testing is a practical minimum, with additional testing after flooding, construction near the well, changes in taste or odour, or a shift in staining. Water chemistry can change over time, and a softener only addresses hardness. It does not remove every contaminant or solve every well-water issue.

Inspect the System and Its Surroundings

A brief visual inspection can prevent small issues from becoming expensive repairs. Every few months, look around the softener for dampness, salt residue, cracked tubing, corrosion, or water on the floor. Confirm that the bypass valve is in the service position unless you intentionally placed it in bypass for maintenance.

Keep the area around the unit accessible. Storing boxes tightly against the brine tank or control valve makes leaks harder to detect and makes service more difficult. In cold areas, ensure the equipment and plumbing are protected from freezing. A frozen line or tank can cause significant damage.

If your home has a pre-filter ahead of the softener, change it on schedule. Sediment filters protect valves and resin from dirt, sand, and debris. Ignoring a clogged pre-filter can reduce water pressure and place unnecessary strain on the treatment system.

When to Call for Water Softener Service

Some issues are straightforward, but repeated hard water, constant regeneration, leaks, unusual noises, or error codes deserve professional attention. The same applies if the unit is more than 10 years old and performance has declined. Components such as seals, injectors, valves, and resin can wear over time.

Professional service is especially valuable when a home has iron staining, sulphur odours, well-water bacteria concerns, or multiple treatment systems. The solution may involve adjusting the softener, cleaning the resin, replacing worn parts, or adding filtration ahead of the unit. Guessing can lead to unnecessary salt use, poor water quality, and avoidable wear on appliances.

Canadian Smart Home Solutions can assess the water, inspect the equipment, and recommend service based on the conditions in your home rather than a one-size-fits-all schedule.

A well-maintained softener should not demand constant attention. Check the salt, keep an eye on regeneration and leaks, test water when results change, and arrange service before a minor performance issue becomes scale throughout the home.

Best Sediment Filters for Wells: What Works

A well can deliver excellent water, but it can also carry sand, silt, clay, rust particles, and fine organic debris into the home. The best sediment filters for wells are not simply the finest filters available. They are the filters sized for your water’s particle load, household flow demand, and the treatment equipment they need to protect.

Choosing the wrong sediment filter can create frustrating pressure loss, frequent cartridge changes, or insufficient protection for a water softener, UV system, plumbing fixtures, and appliances. A properly selected whole-home prefilter keeps abrasive material out of the system while allowing showers, laundry, and kitchen taps to run normally.

What a sediment filter should do for well water

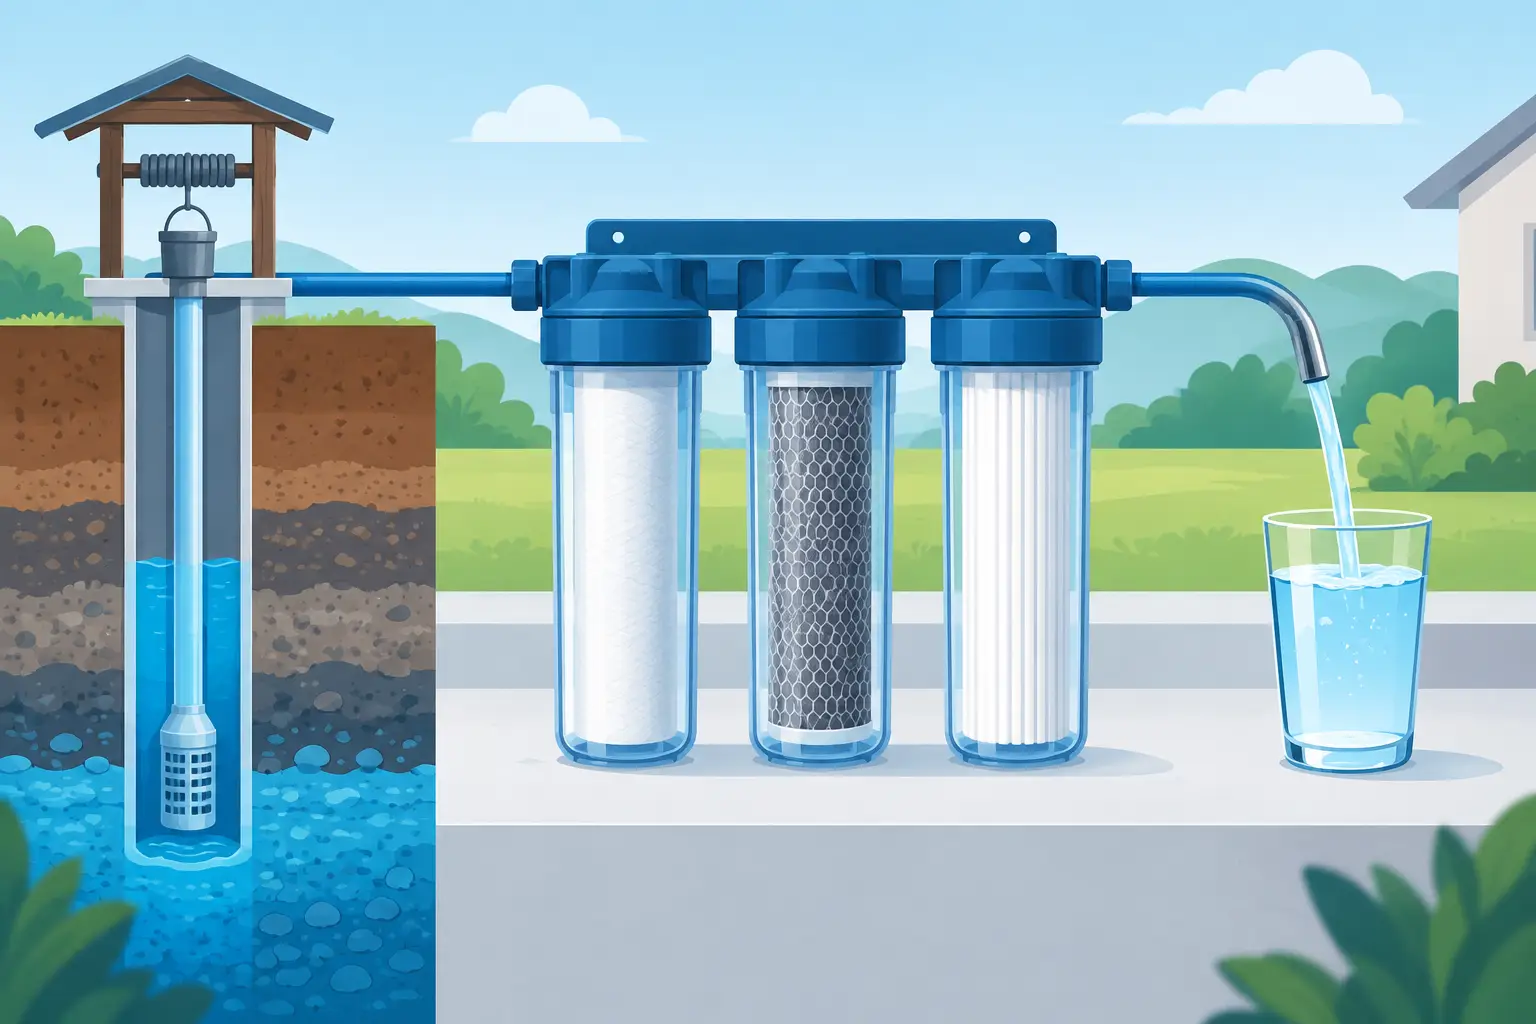
Sediment filtration is the first line of defence for many private wells. It captures suspended particles before they can scratch valve seals, clog aerators, foul ultraviolet sterilizers, or collect in pressure tanks and water heaters. It can also make visibly cloudy water clearer when the cloudiness is caused by physical particles.

However, sediment filters have a specific job. They do not remove dissolved iron, manganese, hardness, sulphur odours, bacteria, nitrates, or lead unless the system includes separate media or treatment stages designed for those contaminants. A cartridge may improve the appearance of water while leaving the underlying water quality issue untouched.

That distinction matters with Ontario well water. One property may need a simple sediment filter because construction activity or seasonal groundwater changes have introduced sand. Another may need sediment protection followed by iron removal, softening, ultraviolet disinfection, or reverse osmosis at the drinking-water tap. Water testing is the reliable starting point.

Best sediment filters for wells by water condition

The best choice depends on the size and type of particles in the water, not just the label on the cartridge. A filter that performs well on visible sand may be unsuitable for fine silt, and a very fine cartridge can restrict water flow in a busy home.

Spin-down filters for sand and larger grit

A spin-down or reusable screen filter is often a practical first stage where a well produces noticeable sand, grit, or larger debris. Water passes through a screen, and captured material collects in a clear housing or flushing chamber. The system can be purged through a valve rather than requiring a replacement cartridge every time debris accumulates.

This option is especially useful where sediment is coarse and recurring. It reduces the burden on downstream cartridge filters and helps protect pumps, softeners, and control valves. It is not usually enough on its own for fine silt or cloudy water, because very small particles can pass through the screen.

Pleated cartridges for variable sediment loads

Pleated sediment cartridges are a strong all-purpose choice for homes with moderate levels of sand, silt, and rust. Their folded surface provides more filtration area than a basic string-wound or spun cartridge, which can support better flow and a longer service interval in the right conditions. Many can also be rinsed and reused, although replacement is often the better choice once staining, damage, or persistent fouling develops.

For a typical well-water application, a pleated cartridge in a large-capacity housing is often a sensible balance between particle removal and household pressure. The actual micron rating should be selected based on testing and observed sediment, not guesswork.

String-wound and depth filters for fine silt

When the water contains fine silt, clay, or a broad mix of particle sizes, a depth-style cartridge can be more effective. String-wound and melt-blown cartridges trap sediment throughout the filter media rather than only on the outer surface. This gives them good holding capacity for fine particulate matter.

The trade-off is that these filters are generally disposable and can plug quickly if the sediment load is heavy. If a 5-micron depth cartridge needs changing every few weeks, the solution may be a larger housing, a coarser first-stage filter, or an automatic backwashing system rather than repeated cartridge changes.

Big-capacity housings for whole-home flow

For most family homes, the housing is as important as the cartridge. Larger whole-home housings hold longer cartridges and provide more surface area, reducing pressure drop and extending service life. They are generally a better fit than small under-sink-style filter housings when the goal is to protect the entire plumbing system.

A properly sized installation should account for peak demand. A home with two bathrooms, a dishwasher, laundry equipment, and multiple occupants may require substantially more flow than a seasonal cottage. Commercial properties, farms, multi-unit buildings, and institutional facilities need engineered filtration capacity that considers sustained flow, pressure, treatment redundancy, and maintenance access.

Choosing the right micron rating

Micron rating describes the approximate size of particles a filter is intended to capture. A lower number catches finer material, but it also creates more resistance as sediment collects. Finer is not automatically better.

A 50- or 100-micron screen may be appropriate as a prefilter for visible sand. A 20-micron cartridge is often used for general sediment reduction. A 5-micron cartridge is common before UV disinfection because suspended particles can shield microorganisms from ultraviolet light. In some applications, 1 micron may be appropriate, but only if the system has enough capacity and the water does not foul the cartridge too quickly.

There is also a meaningful difference between nominal and absolute ratings. A nominal 5-micron filter captures a high percentage of particles around that size, while an absolute-rated filter has a more tightly controlled performance standard. For household well systems, the proper rating depends on the treatment goal and the manufacturer’s specifications.

When a cartridge filter is not enough

A cartridge filter is convenient, but it is not the right answer for every well. If the water contains heavy, ongoing sediment, homeowners can spend too much time replacing cartridges and still experience poor pressure. In these cases, an automatic backwashing sediment filter may provide a more dependable long-term solution.

Backwashing systems use a media bed and periodically reverse the water flow to flush accumulated sediment to drain. They suit homes with significant turbidity or recurring fine material, provided there is adequate flow, drainage, and space for the equipment. They also require correct setup. An undersized drain line or improper backwash rate can limit performance.

Sediment may also be a symptom rather than the only problem. Orange or brown staining can point to iron. Black staining may indicate manganese. A rotten-egg smell can be related to hydrogen sulphide or certain bacteria. Cloudiness may come from silt, but it can also reflect chemistry that needs a different treatment process. A professional water analysis prevents a filter purchase from becoming an expensive trial-and-error exercise.

Installation details that protect the entire system

A whole-home sediment filter is normally installed after the pressure tank and before downstream treatment equipment. This arrangement protects water softeners, iron filters, UV units, and household plumbing from debris. A bypass valve and pressure gauges on each side of the filter make maintenance much easier: a growing pressure difference shows that the cartridge is becoming restricted.

The installation should also allow enough clearance to remove the filter cartridge without struggling around pipes or walls. In cold Ontario basements, utility rooms, and seasonal properties, equipment must be protected from freezing. If ultraviolet treatment is planned, sediment filtration should be matched to the UV manufacturer’s pretreatment requirements.

Canadian Smart Home Solutions approaches well water treatment as a complete system, not a single cartridge sale. The right recommendation begins with the water source, test results, household demand, existing equipment, and the practical maintenance level the property owner can manage.

A practical maintenance plan

Check the filter housing and pressure regularly, especially after heavy rain, spring thaw, well repairs, or nearby excavation. Replace or clean the filter when pressure drops noticeably, water flow slows, or the cartridge is visibly loaded with sediment. Do not wait until taps are barely running, as prolonged restriction places unnecessary strain on the water system.

Keep spare cartridges on hand if your well has seasonal sediment changes. If replacement frequency suddenly increases, investigate the cause. A shift in groundwater conditions, a damaged well component, a failing pump, or disturbed sediment can change what the treatment system needs.

The right sediment filter should become quiet protection: cleaner water at every tap, less wear on valuable equipment, and fewer surprises when your family needs water most.

Why Is Well Water Cloudy? Causes and Fixes

Cloudy water from a private well can be unsettling, particularly when it appears suddenly at the kitchen tap or after a heavy rainfall. If you are asking, “why is well water cloudy,” the answer may be as simple as harmless air bubbles – or it may point to sediment, mineral issues, plumbing corrosion, or a change in the well itself. The appearance alone cannot confirm whether water is safe to drink, which is why a proper assessment matters.

For Ontario homeowners, clear water is about more than appearance. It affects confidence in drinking water, the performance of water-using appliances, plumbing maintenance, laundry results, and the reliability of the whole household water supply.

Why Is Well Water Cloudy? Start With the Pattern

The first useful clue is how the cloudiness behaves once the water sits in a clear glass. Fill a glass from the cold-water tap and place it on the counter for several minutes. If the cloudiness clears from the bottom upward, tiny air bubbles are usually the cause. If particles settle on the bottom, sediment or mineral debris is more likely. If the water remains milky, coloured, or hazy, testing is the right next step.

Also pay attention to when the problem occurs. Cloudiness only at one fixture can indicate a local plumbing issue. Cloudiness throughout the home suggests a well-water or whole-home plumbing concern. Water that becomes cloudy after storms, seasonal snowmelt, power interruptions, construction, or unusually high water use deserves closer attention.

Tiny Air Bubbles

Air in well water is common and is often temporary. Pressure changes in a well pump system, a pressure tank issue, or changes in water temperature can release dissolved air as tiny bubbles. This produces a white or cloudy appearance, but the water becomes clear as the bubbles rise and disappear.

Air bubbles are generally not a water-quality hazard on their own. However, frequent sputtering taps, inconsistent pressure, or persistent cloudiness can signal a pump, pressure tank, or plumbing issue worth having inspected. Treat the cause rather than assuming every white-looking glass of water is a filtration problem.

Sediment From Soil, Sand, Silt, or Clay

Sediment is one of the most common reasons well water looks cloudy. Fine sand, silt, clay, and organic particles can enter the water supply when the well is disturbed or when groundwater conditions change. Heavy rain can increase surface runoff and groundwater movement, while a damaged well cap or compromised casing can allow unwanted material closer to the water source.

Sediment may settle in a glass, create a gritty feeling, clog faucet aerators, and shorten the service life of appliances and treatment equipment. It can also reduce the effectiveness of other systems. For example, ultraviolet disinfection works best with clear water because particles can shield microorganisms from UV light.

A properly selected sediment filtration system can capture these particles before they reach taps, fixtures, water heaters, and appliances. The right micron rating matters. A filter that is too coarse may not solve the issue, while one that is too fine can restrict flow or require frequent cartridge changes. Water volume, particle type, and household demand should guide the design.

Mineral Changes Can Make Well Water Look Hazy

Ontario well water frequently contains naturally occurring minerals. Calcium and magnesium cause hardness, while iron and manganese can produce staining, deposits, and cloudy-looking water under certain conditions. These minerals may remain dissolved underground but become visible after water is exposed to air, pressure changes, or heat.

Iron often leaves orange, brown, or reddish staining in toilets, sinks, and laundry. Manganese can leave black or dark brown marks. Hard water may create white scale on faucets, shower doors, kettles, and heating elements. These symptoms do not always appear at the same time, but together they help identify the treatment approach.

A basic sediment filter is not necessarily the answer for dissolved minerals. Iron and manganese may require oxidation and specialized filtration. Hardness is typically addressed with a water softener. In some homes, a staged whole-home system is the practical choice: sediment reduction first, followed by iron or sulphur treatment, softening, and disinfection where test results call for it.

White Cloudiness in Hot Water

If only hot water is cloudy, the water heater may be part of the problem. Mineral scale, corrosion, or sediment inside the tank can be released when hot water is used. This is particularly common in hard-water areas, where scale accumulates on heating elements and tank surfaces.

Flushing a water heater may help in some cases, but it does not correct the source of excessive hardness or sediment entering the home. A treatment plan that protects the incoming water can reduce future buildup, improve heating efficiency, and help extend the life of the water heater.

Cloudy Well Water After Rain Requires Attention

Cloudiness that appears after rain should not be ignored. Surface water can carry soil, bacteria, organic matter, and other contaminants into vulnerable wells, especially where the well cap, casing, grading, or drainage conditions are poor. Older wells and shallow wells may be more susceptible, but any private well can be affected by changes around the property.

Do not rely on colour, odour, or clarity to judge whether water is microbiologically safe. Bacteria and other microorganisms are invisible. If your water turns cloudy after rainfall, or if there has been flooding near the well, arrange water testing before relying on the supply for drinking, cooking, or infant formula.

Corrective work may involve improving drainage, repairing or replacing the well cap, addressing casing concerns, disinfecting the well when appropriate, and installing treatment equipment. For ongoing bacterial protection, an ultraviolet sterilizer can be an effective final barrier – but only after prefiltration has removed sediment and reduced water cloudiness.

Could Cloudy Water Come From Your Plumbing?

Sometimes the well is not the source. Corroding pipes, aging galvanized plumbing, loose scale, or work completed on a plumbing line can release fine particles into water. If the cloudiness is isolated to one tap, begin there. Remove and inspect the faucet aerator, then compare water from cold and hot taps at other fixtures.

Water that is blue-green, reddish, yellow, or black may indicate specific plumbing or mineral concerns. Homes with older plumbing should also consider testing for lead where applicable. Lead cannot be identified by sight, taste, or smell, and clear water is not proof that it is lead-free.

A water analysis provides a clearer path than guessing based on colour. It can identify concerns such as turbidity, iron, manganese, hardness, sulphur, pH imbalance, bacteria, and other contaminants that affect treatment selection.

What to Do When Your Well Water Turns Cloudy

Begin by noting whether the water clears in a glass, whether particles settle, and whether the issue affects every tap. Avoid using a cloudy supply for drinking until you understand the cause, particularly if the change was sudden or followed heavy rain, flooding, or well work.

Next, have the water tested and inspect the well area. Check that the well cap is secure and that the ground slopes away from the well rather than directing runoff toward it. If you use existing filters, check whether cartridges are overdue for replacement or whether the system is being bypassed because of a clogged filter.

Treatment should match the water, not just the symptom. A homeowner dealing with sandy water needs a different solution than a family dealing with hard water, iron staining, sulphur odours, or bacteria risk. Canadian Smart Home Solutions can assess well water conditions and recommend whole-home treatment equipment sized for the property’s flow rate, water use, and specific test results.

Clear Water Should Also Be Dependable Water

Cloudiness may be harmless air, but it can also be the first visible sign that your well or plumbing needs attention. The practical goal is not simply to make water look clear for a moment. It is to protect your household with treatment that addresses the actual cause, supports reliable water pressure, and helps safeguard fixtures and appliances over time.

When well water changes, act early. A timely test and a correctly designed treatment system can replace uncertainty at the tap with water your family can use with greater confidence.

Call Now
Get a Quote